It's not worth me writing out the tutorial as the one I followed was so good - so head there! The bags are filled with rice - easy to get and cheap!
Showing posts with label craft. Show all posts
Saturday, 2 February 2013
Heat Packs
As part of the Stashbusting Sewalong January Itty Bits, I managed to make, along with my pocket warmers, heat packs {I did finish in January - just!). There are many tutorials out there for heat packs but I really liked this one from fellow fellow with the split compartments and stop stitching around the sides. It was an easy project apart from the end trying to sew together the hole with loads of rice in the pack already! I made a bit of a mess with my thread but it's small and white so not wholly noticeable :)
It's not worth me writing out the tutorial as the one I followed was so good - so head there! The bags are filled with rice - easy to get and cheap!
So for January, I managed pocket warmers and heat packs - pretty fitting for the weather! I think I will continue January's theme throughout the challenge as I really love short projects and have plenty of small scraps left.
It's not worth me writing out the tutorial as the one I followed was so good - so head there! The bags are filled with rice - easy to get and cheap!
Sunday, 27 January 2013
DIY: Chili and Taco Seasoning
It was one of my good friend's birthday last month. She too is a keen cook so I decided to give her something food-related. I always want to make spice mixes I find on pinterest but I feel like many of them would be a lot of fun to make and then never be used. But then I found chili and taco mix! Starzy cooks for her house every week and I am sure she has done tacos and chili before - ie, a mix she would actually use! It's also good for her as it's not common to have a whole load of spices in a student house..
I got the recipe from My Baking Addiction and just substituted the onion powder with more garlic powder as I didn't have any. I also halved the chili flakes as I used some from my uncle's garden which are DANGEROUSLY hot!
4 tbsp of chili powder
2 tbsp ground cumin
1 tsp garlic powder
1 tsp onion powder
1/2-1 tsp crushed red pepper flakes
1/4 teaspoon cayenne pepper
1 teaspoon dried oregano
2 teaspoons paprika
3 teaspoons sea salt
4 teaspoons black pepper
Simply mix all ingredients together!
Tuesday, 22 January 2013
Pocket Warmers
For my first Stashbusting Sewalong project I have committed to I made pocket warmers. These probably would have been a really great thing to make before Christmas for gifts, but there just wasn't the time. The last term has been very hectic and coming back to Brighton after my unusually long holiday at home this year is very different and I felt inspired to tackle my ever-growing pinterest list. Short projects really appeal to me as I never have enough time and I can get these done in an afternoon. They were super easy and I quickly made three pairs, one already gifted to my Aunt. I used some Cath Kidston squares I ordered a while back which are so tiny it was difficult to find anything to do with them.
You will need:
Fabric scraps
Pencil/fabric marker
Thread
Rice
Pinking shears
Draw a circle on one of your pieces of fabric with a fabric marker or pencil.
These will be great gifts next Christmas!
You will need:
Fabric scraps
Pencil/fabric marker
Thread
Rice
Pinking shears
Draw a circle on one of your pieces of fabric with a fabric marker or pencil.
Place your chosen fabrics right side out and sew around the circle leaving a small opening for the rice. Using a funnel or jug pour rice into your pouch (mine were about 5/6 full).
Sew the gap closed then cut around the sewn circle with pinking shears.
These will be great gifts next Christmas!
Friday, 4 January 2013
DIY: Glasses from Bottles
Happy New Year! I hope everyone had wonderful holidays. I don't have a resolution as such but I do want to keep my blog up better than last year - I simply did not have the time with my university work. The first half of this year is my last term as a law undergraduate so it's going to get very busy and important but I want to keep more time to craft. A lot of my more recent posts have been cooking or baking so I want to incorporate more craft and sewing in my blog this year - I have neglected my sewing machine due to lack of time for too long!
Something I have wanted to try out for so long is turning wine bottles into beautiful green glasses. I have seen them in a lot of places but this picture from pinterest made me particularly keen. I love the indented glass base in these.
via liveinart
Bailey *borrowed* acetone from work and we went on a mission to find perfect bottles. On our first try we used some beer bottles we didn't want as glasses as a practice, and then did a few wine bottles with our new found skills. On our first attempt out of 7 bottles, we managed to make 2 glasses (one beer, one wine) that were usable. The rest splintered or cracked. It's a bit of a process but we got the hang of it and our odds got better the second day we did it.
We struck gold and found some heineken bottles with the "label" almost painted on like on Corona bottles. These just happened to be the perfect thickness and we had a 99% success rate with these and quickly knocked up 16. We didn't have huge successes with the wine bottles. The below pictures are from our first couple of days with other beer bottles and wine bottles.
There are many tutorials out there, but we mainly followed this one from The Thrillz of Hillz.
Acetone/nail polish remover
Yarn (we used polycotton blend)
Lighter
Large bucket with cold water (and ice)
Tie your yarn around the bottle then encircle 3-5 times depending on the thickness of the bottle. Generally we used 3 times around for the beer and 4 or 5 for wine.
Soak the yarn in acetone. Instead of having to remove it from the bottle like in the tutorial we used the little bottles and poured it around the yarn. It used a lot less acetone, was quicker and easier and gave the same result.
Hold the bottle sideways over the sink/bucket and quickly light the yarn. Rotate the bottle with your hands until the flame burns out.
Immediately plunge the bottle head first into the cold water. It should crack and fall off. If it cracks but doesn't fall off shake it a bit or tap it with a wooden spoon for more stubborn bottles. Quite often we managed to get two cuts - one above and one below the string. We're not sure why!
Using heavy duty sandpaper sand down the rim of the bottles inside and out. Careful not to wrap the sandpaper around the rim as you will scratch the top of your glass. Below is one of our successful wine bottle glasses.
I am now the proud owner of a set of 8 Heineken water glasses! All I have to do is finish sanding down the rims. Next I want to do some Corona ones.
Something I have wanted to try out for so long is turning wine bottles into beautiful green glasses. I have seen them in a lot of places but this picture from pinterest made me particularly keen. I love the indented glass base in these.
via liveinart
Bailey *borrowed* acetone from work and we went on a mission to find perfect bottles. On our first try we used some beer bottles we didn't want as glasses as a practice, and then did a few wine bottles with our new found skills. On our first attempt out of 7 bottles, we managed to make 2 glasses (one beer, one wine) that were usable. The rest splintered or cracked. It's a bit of a process but we got the hang of it and our odds got better the second day we did it.
We struck gold and found some heineken bottles with the "label" almost painted on like on Corona bottles. These just happened to be the perfect thickness and we had a 99% success rate with these and quickly knocked up 16. We didn't have huge successes with the wine bottles. The below pictures are from our first couple of days with other beer bottles and wine bottles.
There are many tutorials out there, but we mainly followed this one from The Thrillz of Hillz.
Acetone/nail polish remover
Yarn (we used polycotton blend)
Lighter
Large bucket with cold water (and ice)
Tie your yarn around the bottle then encircle 3-5 times depending on the thickness of the bottle. Generally we used 3 times around for the beer and 4 or 5 for wine.
Soak the yarn in acetone. Instead of having to remove it from the bottle like in the tutorial we used the little bottles and poured it around the yarn. It used a lot less acetone, was quicker and easier and gave the same result.
Hold the bottle sideways over the sink/bucket and quickly light the yarn. Rotate the bottle with your hands until the flame burns out.
Immediately plunge the bottle head first into the cold water. It should crack and fall off. If it cracks but doesn't fall off shake it a bit or tap it with a wooden spoon for more stubborn bottles. Quite often we managed to get two cuts - one above and one below the string. We're not sure why!
Using heavy duty sandpaper sand down the rim of the bottles inside and out. Careful not to wrap the sandpaper around the rim as you will scratch the top of your glass. Below is one of our successful wine bottle glasses.
A few of the bottles split with a strange point in the middle. I just sanded it down so was no longer spiky and I quite like it like this!
Wednesday, 4 January 2012
Cork heat mats
I love the material cork. Firstly, because it is completely free (providing you drink wine/have parents and friends who drink wine and save the corks!), and it is so versatile. I found this blog and loved the idea of cork coasters. I tried to find the circular coaster bases but could only find larger thicker heat mats, so I used them instead! I started making these in the summer but couldn't post it until now as I gave a few of them as gifts.. a recurring theme in my life!
Stick them on as close as you can and hold each down so they are properly stuck.
Before I got this glue gun I used some sort of extra-strong glue and it didn't work quite as well. I do recommend a glue gun.
Stick them on as close as you can and hold each down so they are properly stuck.
With a scalpel cut off the excess cork.
Sand around the sides until it is smooth.
I love it (if I do say so myself)!
Wednesday, 21 December 2011
Vanilla Extract
I found a great tutorial for making your own vanilla extract and decided to make some in the summer so it would have a good few months to "steep" to be perfect in time for Christmas. It was super easy and unlike what my parents thought vanilla bean really isn't that expensive (even here in Switzerland!) The vodka was the pricier ingredient as I didn't use the crappy stuff.
I also tried out Vanilla Sugar which literally was slicing the vanilla pods in half then putting them in with the sugar in a jam jar and shaking.. a lot!
And here are them now! I made cut labels to size out of white stickers and wrote on them.
All ready to be gifted to an unsuspecting person!
I also tried out Vanilla Sugar which literally was slicing the vanilla pods in half then putting them in with the sugar in a jam jar and shaking.. a lot!
Here are the bottles a few minutes after I made them. I only made three as I had to buy the empty bottles which did cost too much to buy more, but they are pretty!
Starting to steep properly after a few days..
All ready to be gifted to an unsuspecting person!
Monday, 24 October 2011
Map stationary
I have a growing obsession with maps. One of the first crafts I saw to use maps with was envelopes. I love sending mail through the post and write a lot of letters to friends overseas.. and I love receiving mail (hint!)! I can't find the initial tutorial I found for the idea for this stationary but I have seen many blogs and tutorials doing the same thing. Below is the card - plain side and a map side and then them in the envelopes in the next picture.
If I made more, or didn't like them so much, they could be a nice gift. When I have more time..
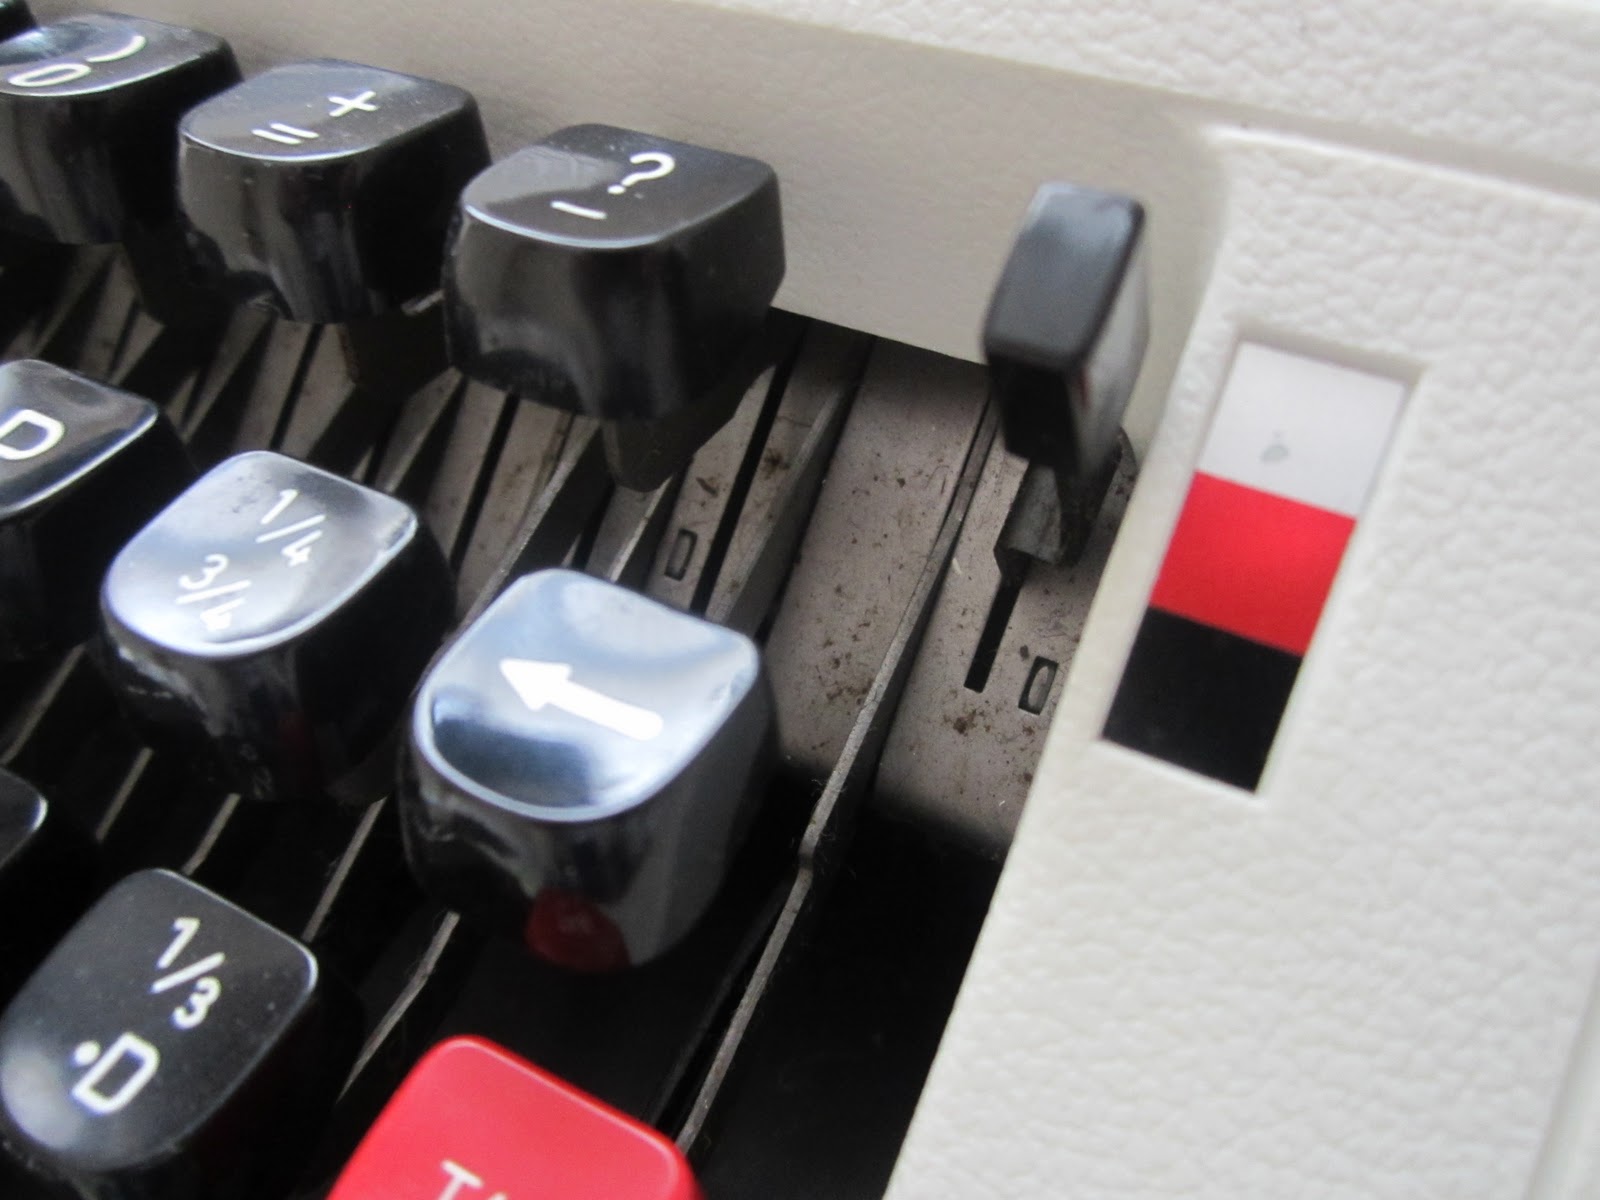
I attempted to type baileyb a letter with my typewriter on one of the map cards but since I changed the ink ribbon on it, it hasn't been working properly. I need to figure out what the problem is. Regardless I sent her the fail of a letter - I love how cool it looks!!
Saturday, 24 September 2011
Typewriter
I have now officially moved into my house in Brighton - my first ever own (shared with 4 others) house! It's all very exciting here getting everything sorted and having time to relax before uni, and I am still in the process of unpacking and beautifying my room - pictures will be up soon. Yesterday I was in town with Faron and dragged him into Snooper's Paradise - one of my favourite shops in Brighton. It's antiques/second hand/vintage treasures/junk.. I could spend hours in there. I did nearly buy a lot of things - some old maps, a gorgeous vintage mirror, a whitewashed desk (bit pricey), but I did actually decide to part with my money on one thing - a typewriter. It has a lid (first pic) that doubles up as the other half of a carrying case!! Also at £18, I think a bargain. I researched online and could only find them for about £40.
As well as always thinking they were awesome, I thought it could be useful for some craft things like labels for things I make, and even cards. I am also a huge lover of snail-mail and still regularly write to a lot of friends overseas so I will be making use of it a lot for letter-writing. I am sure baileyb will be even more excited now to receive a letter from me.
Thursday, 8 September 2011
Negatives Lamp
This was one of the first crafts I saw that really got me wanting to make things start crafting. My mum's birthday was coming up so I gathered the small amount of negatives I have left stashed under my bed and picked the best ones - nearly all my mum's family are in them. I got the idea from Poopscape Projects if you also still have negatives lying around your house somewhere. Again I used mod podge which I am beginning to think I will need more of.. here are some pics of the final product!
It was pretty easy although if I were to do it again (unfortunately I don't have quite enough decent negatives) I would paste them vertically as they didn't stick perfectly around the edges but you can hardly tell. Mum was pleased with it so that's excellent!
Saturday, 3 September 2011
Drawers makeover
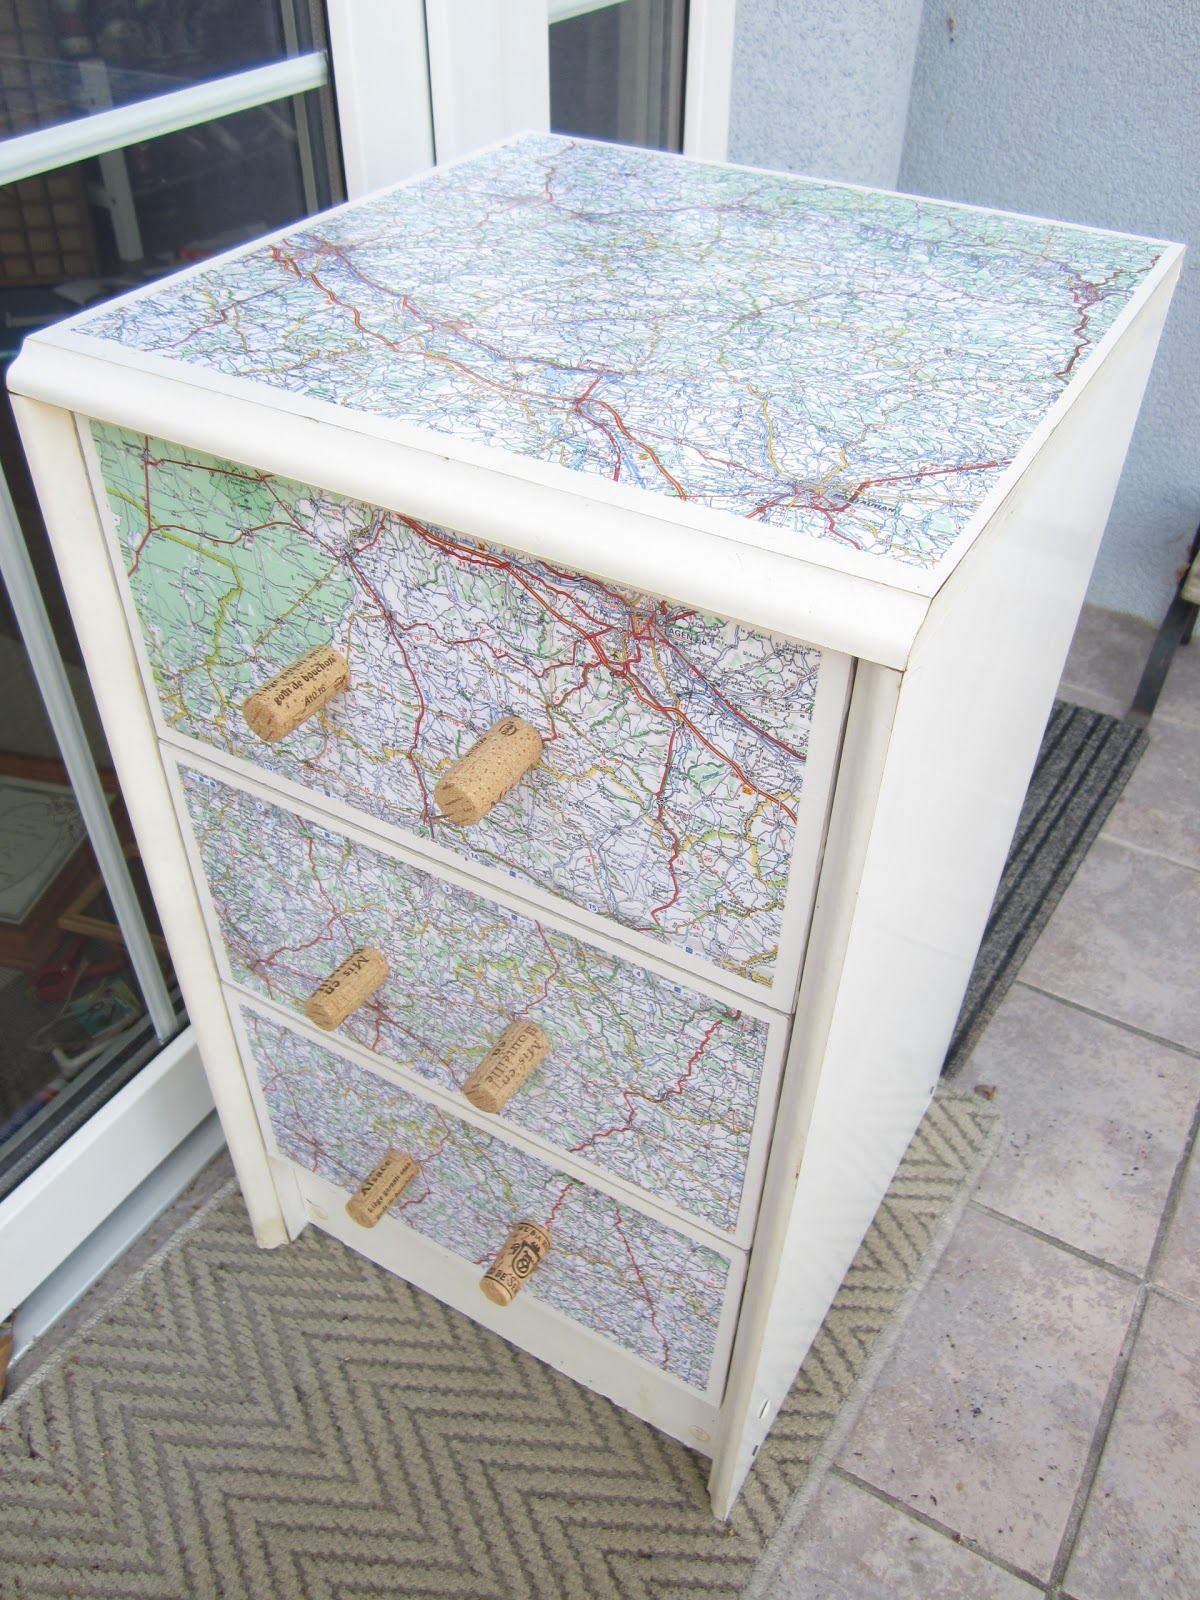
I found this white chest of drawers in my garage a few weeks ago just after my dad let me have all his old vintage maps for my crafts...! I got the idea from an antique store in Brighton that has the most beautiful pieces of furniture covered in old maps, so instead of paying the 150 pounds to buy one, I tried to make one instead!
My friend Christine kindly brought me back some mod podge from the US when she went last weekend which was perfect for this. I decided to use all french maps (what turned out to be all the same map) as I live in France so it's a nice theme :)
I wanted to change the handles to rope to give it a nautical feel, but then I saw the pile of corks lying in my room waiting to be used in some other craft and tried them out.. (they are all from FRENCH bottles of wine!)
I stuck some nice paper in the base of the drawers as even after giving it a good clean it was still a bit grotty - fine now though!
I'm really happy with how it turned out and it's my new craft chest of drawers.. finally no more overflowing boxes on my floor!
My friend Christine kindly brought me back some mod podge from the US when she went last weekend which was perfect for this. I decided to use all french maps (what turned out to be all the same map) as I live in France so it's a nice theme :)
I wanted to change the handles to rope to give it a nautical feel, but then I saw the pile of corks lying in my room waiting to be used in some other craft and tried them out.. (they are all from FRENCH bottles of wine!)
I stuck some nice paper in the base of the drawers as even after giving it a good clean it was still a bit grotty - fine now though!
Subscribe to:
Posts (Atom)