Pages

Tuesday, 5 February 2013

Courgette & Chocolate Chip Muffins

I've seen many recipes for courgette (zucchini!) bread and muffins and finally got around to making some. I found this recipe on Alyssa B. Young and had most of the ingredients already.


They are really great. The recipe is simple and they turned out better than my cakes usually do with very little effort! The cinnamon especially really worked with the chocolate and they are really light.

My modified version is below - I made a few changes. I'm not a huge nut fan so I took away the walnuts and I didn't have any vanilla so I left it out, and I'm not sure it would add anything. I didn't want to put as much oil in as she suggested but then it seemed dry so I added another egg - worked perfectly! I tried two batches, one with 1C courgette and one with 2C courgette and both were really good so I would recommend doing it with 2C. Pictures are with 1C.

Courgette and Chocolate Chip Muffins
Makes 12
1.5 C all-purpose flour
3/4 C sugar
1 tsp baking/bicarbonate soda
1 tsp ground cinnamon
1/2 tsp salt
2 eggs, lightly beaten
1/4 C vegetable oil
1/4 C milk
1 tbs lemon juice
1-2 C shredded corguette/zucchini (approx 1-2 corguette)
1/4 C dark chocolate chips

In a bowl, combine flour, sugar, baking soda, cinnamon and salt. Combine the egg, oil, milk, lemon juice; mix well. Stir into dry ingredients just until moistened. Fold in zucchini and chocolate chips.


Fill greased or paper-lined muffin cups two-thirds full. Bake at 350 degrees F/175 degrees C for 25-35 minutes or until muffins test done.


Saturday, 2 February 2013

Heat Packs

As part of the Stashbusting Sewalong January Itty Bits, I managed to make, along with my pocket warmers, heat packs {I did finish in January - just!). There are many tutorials out there for heat packs but I really liked this one from fellow fellow with the split compartments and stop stitching around the sides. It was an easy project apart from the end trying to sew together the hole with loads of rice in the pack already! I made a bit of a mess with my thread but it's small and white so not wholly noticeable :)

It's not worth me writing out the tutorial as the one I followed was so good - so head there! The bags are filled with rice - easy to get and cheap!


So for January, I managed pocket warmers and heat packs - pretty fitting for the weather! I think I will continue January's theme throughout the challenge as I really love short projects and have plenty of small scraps left.

Wednesday, 30 January 2013

DIY: Pom Pom!

I knitted this hat a few years ago when I first learnt to knit and haven't really worn it at all because I thought it was a bit boring. I really like the colour and lost my other hat so decided to put a pom pom on so that I would wear it more!


I do want to do more knitting but I'm not very fast and so get bored easily. Hats are good for me as they are quick but it's been so long I have more or less forgotten how to use my circular needles!

The pom pom took less than 5 minutes and I think really transformed the hat. I've seen plenty of tutorials on pinterest on how to make a pom pom so I just did it by memory.

Wrap the yarn around your fingers at least 50 times.


Take it off your fingers and tie a long piece of yarn around the middle of the loops. Cut the middle of all the loops when the middle is firmly tied.


 Using a large eye needle simply sew into the top of the hat, as many times until it is firmly attached. Then cut the long threads and trim the pom pom ends until you are happy!


I will be wearing the hat more now! Especially when I get back to the UK and it's COLD!

Sunday, 27 January 2013

DIY: Chili and Taco Seasoning

It was one of my good friend's birthday last month. She too is a keen cook so I decided to give her something food-related. I always want to make spice mixes I find on pinterest but I feel like many of them would be a lot of fun to make and then never be used. But then I found chili and taco mix! Starzy cooks for her house every week and I am sure she has done tacos and chili before - ie, a mix she would actually use! It's also good for her as it's not common to have a whole load of spices in a student house..

I got the recipe from My Baking Addiction and just substituted the onion powder with more garlic powder as I didn't have any. I also halved the chili flakes as I used some from my uncle's garden which are DANGEROUSLY hot!

4 tbsp of chili powder
2 tbsp ground cumin
1 tsp garlic powder
1 tsp onion powder
1/2-1 tsp crushed red pepper flakes
1/4 teaspoon cayenne pepper
1 teaspoon dried oregano
2 teaspoons paprika
3 teaspoons sea salt
4 teaspoons black pepper


Simply mix all ingredients together!


Thursday, 24 January 2013

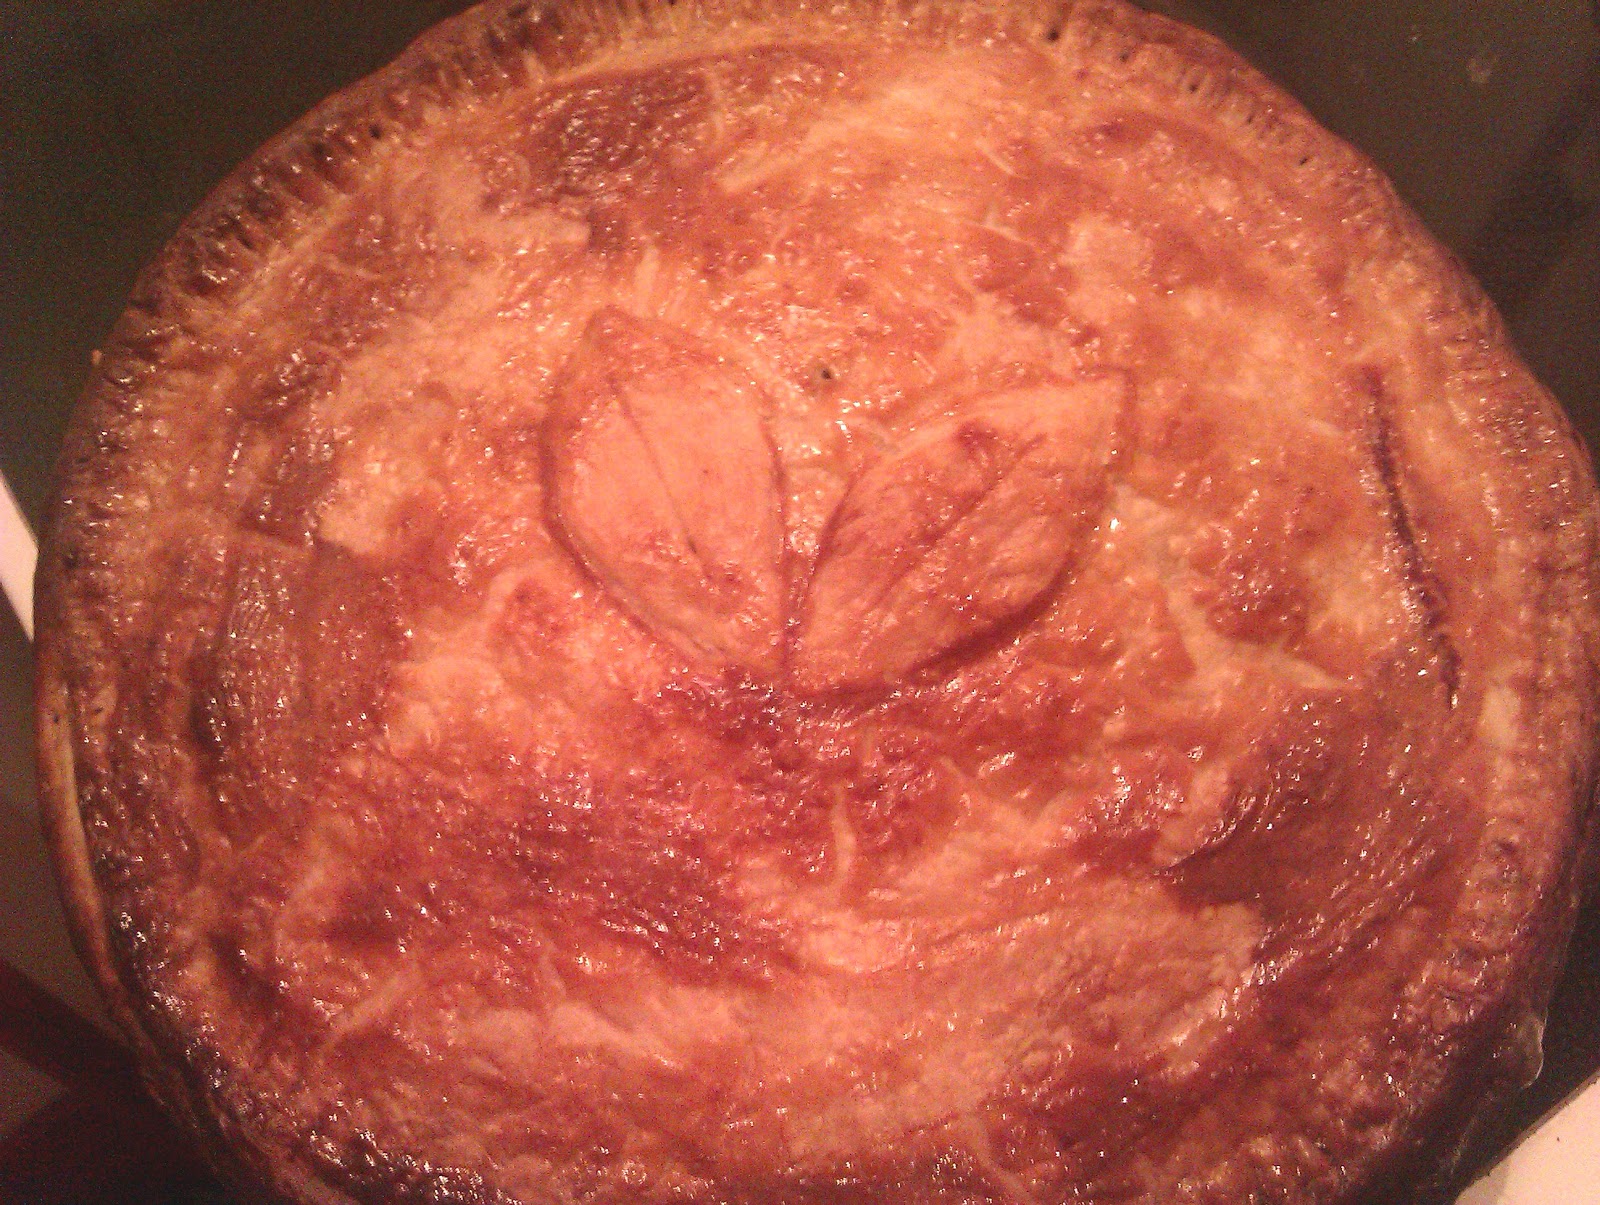
Pork, Apple and Chestnut Pie

I found a recipe from Waitrose magazine for a savoury pie that sounded delicious and even better, only had a handful of ingredients. This is such an easy recipe and really was incredible.

A small change I made with the recipe was mix half the apple mixture and chestnuts into the sausage before putting it in the pie before topping it with the remaining halves of the two. I wanted the flavours to mix and didn't want seperate layers of them. It was delicious like this!

Pork Apple and Chestnut Pie
450g Pork sausage meat
2 tbsp Chopped fresh sage leaves
1/2 tsp Cayenne pepper
225g Bramley cooking apples, peeled, cored and sliced
1 tbsp Caster sugar
375g puff pastry (Jus-Rol all butter)
200g Whole cooked chestnuts (Merchant gourmet)
Beaten egg, to glaze

Preheat the oven to 220 degrees C. Mix the sausage meat with the sage and cayenne pepper. Place the apples in a non-stick pan with the sugar, cover with a lid and cook gently until the apples are softened (stir to break down any larger pieces). Set aside.


Roll the pastry out if needed and line a 23cm metal pie plate or shallow flan tin, leaving a little hanging over the edge. 


At this point I mixed half of the apple and chestnuts into the sausage meat, but you can also keep them in seperate layers. Spread the sausage meat over the base of the pastry then top with chestnuts and finally the cooled apple. Top with a thin layer of pastry and use a fork to seal the edges together,


You can decorate with any pastry trimmings. 


This is very easily freezeable - simply open freeze the uncooked pie then wrap tightly in foil and return to the freezer. To use, defrost completely then do the below.

Before cooking, brush the pie with beaten egg and bake for 30 minutes, then turn the oven down to 180 degrees C and cook for another 15-20 minutes until the filling is cooked and the pastry is puffed up and golden brown.


I served this with just gravy but grainy mustard is also recommended by the recipe.

Tuesday, 22 January 2013

2013 re-SEW-lution: Focus on Enjoyment!

I have been spending more time recently enjoying being by myself and taking time to look through other people's blogs and plan my own projects. I came across So I sewed this's post on 2013 re-SEW-lution: focus on Enjoyment and immediately wanted to take the pledge. So many pledges this year; 2013 is the year! So without further ado;

I will focus on enjoyment this year!

Sewing related, I will be taking more time over my projects to end up with something of better quality, I will not cut any corners like I have done in the past. I want to really love my creations and want to feel proud of them. And, in accordance with the Stashbusting Sewalong, will be using fabric already in my stash so I don't spend any more money on fabric I do not need.

However, I am going to extend my pledge beyond sewing and just to my life in general. Within reason, as I need to pass my law degree this year (!), I will make time for my friends, the things I enjoy and for myself. I won't be convinced into doing things I do not enjoy. I will do things that make me happy and make others happy.

That is my pledge!

Spread the enjoyment!

Pocket Warmers

For my first Stashbusting Sewalong project I have committed to I made pocket warmers. These probably would have been a really great thing to make before Christmas for gifts, but there just wasn't the time. The last term has been very hectic and coming back to Brighton after my unusually long holiday at home this year is very different and I felt inspired to tackle my ever-growing pinterest list. Short projects really appeal to me as I never have enough time and I can get these done in an afternoon.  They were super easy and I quickly made three pairs, one already gifted to my Aunt. I used some Cath Kidston squares I ordered a while back which are so tiny it was difficult to find anything to do with them. 

You will need:
Fabric scraps
Pencil/fabric marker
Thread
Rice
Pinking shears

Draw a circle on one of your pieces of fabric with a fabric marker or pencil.


Place your chosen fabrics right side out and sew around the circle leaving a small opening for the rice. Using a funnel or jug pour rice into your pouch (mine were about 5/6 full).


Sew the gap closed then cut around the sewn circle with pinking shears.


These will be great gifts next Christmas!

Thursday, 17 January 2013

Stashbusting Sewalong 2013

I am joining the Stashbusting Sewalong 2013 organized by Cation Designs and EmSewCrazy. The idea is that instead of buying new fabric you use the fabric and scraps you already have. Because I have been so rubbish at sewing this past year this is a really great opporunity to be pushed into using my fabric and actually making things again. I have pledged to use at least 12 different pieces of my stash fabric to make 12 different creations by the end of the year. Mine will be a mixture of clothes and other things. If I can use more than 12 pieces of fabric that would be awesome! I will post everything I make here and also on the Flickr group dedicated to the Sewalong. There are themes for each month so I will be following these the best I can:

"January: Itty Bits! Sew up those remnants left over from another project, use up some of those tiny scraps that you've been saving...as long as it's less than a yard of fabric, it counts! February: THE LOVE CHALLENGE. March: Impending Seasonal Change. Regardless of your hemispherical location, the weather will be changing soon...what will you make? Something fun for the coming spring, or something cozy for fall? April: THE VIBRANT COLOR CHALLENGE. May: THE KNIT CHALLENGE. June: Containment! Get ready for those long car trips, summer outings or some good old fashioned cleaning and organizing! We're thinking bags, boxes, totes, purses, pouches, you name it; this month is all about making things to put other things in."

I need to decide what to do with my stash fabric so here are my potential ideas for the first six months! 
I would like to make one or all of these things but one a month will probably be the limit!

January: Itty Bits!
Heatpacks in any of these fabrics:

Pocket warmers in my Cath Kidston samples (ironed!), perfect size!:

Ruffle diaper covers (for a friend who is pregnant!) in one or both of these fabrics:

February: The Love Challenge
A bow tie for my little 5 year old Valentine who lives in New Zealand in some cool truck fabric as below. 

March: Impending Seasonal change
A skirt for myself ready for summer. I made this skirt for Bailey as you can see in this post and it worked out so well I was going to make one for myself. I haven't yet, clearly, so am planning on making it in this fabric - it's a really nice dark royal blue and has a great weight to it for a skirt. I wear a lot of blue so hopefully it will be a versatile item in my wardrobe.

A sorbetto top like I did before in this below fabric that I initially bought for pyjama pants (and now do not need anymore!)

April: The vibrant colour challenge
Something in this awesome vibrant oil cloth. I don't yet know how to sew with oil cloth so this is my aim for April.

May: The knit challenge

As I have exams in May I may skip this one, especially as I have no leftover stash wool. Maybe I will go my own way with it instead though. Stay tuned.

June: Containment!
Sewing machine cozy in this fabric:

Fabric basket in these fabrics:

As you can now see from the right side of my blog in the panel, I am also doing the No New Clothes Challenge. For 6 months I cannot buy any new clothes and have no upcycle at least one thing I already have in my wardrobe to make it wearable again. I feel like these two challenges tie in nicely with eachother! I'm looking forward to keeping up with my sewing this year!

Tuesday, 15 January 2013

Fried Goats Cheese

The minute I saw the post on Fried Goats Cheese on Rachel Schultz, I had to make it. Within the hour I had organized my dad to bring back the cheese and had the breadcrumbs all ready. Instead of the soft goats cheese I wanted to try it with the melty-stuff but he couldn't find any so we ended up with rounds of goats cheese like this:


I didn't have any parsley so I replaced that with sage, and I didn't use flour - my modified recipe is below.

Fried Goats Cheese
Serves 4
4 rounds goat cheese
1 cup breadcrumbs
1.5 tsp sage
1.5 tsp thyme
1.5 tsp garlic powder
1 egg
Salt & pepper
Olive oil

Mix breadcrumbs, sage, thyme, garlic powder and S&P in a bowl. Crack the egg in a separate bowl and whisk. Dip the round of goats cheese in the egg, fully covering it, then dip in the breadcrumbs, pushing down on the mix to cover it completely.


Put a layer of olive oil in a pan and get to medium high/high depending on how thick your goats cheese is. Cook for 1-2 mins on each side (again, depending on thickness of cheese). Mine took two minutes on each side on a medium high heat.


Remove when golden brown. Great served with salad topped with olive oil and good quality balsamic vinegar. Delicious!!
 

Tuesday, 8 January 2013

White and Dark Chocolate Cheesecake

A friend of mine I lived with in first year is a great cook and has a particular specialty of cheesecake. Every time we have dinner together he brings a cheesecake, and usually it's White and Dark Chocolate Cheesecake after I request it! This cheesecake is so incredible and not too sweet.. you will never love cheesecake so much.

I decided to make it for Boxing day as we had some people coming over. It's super easy to do and doesn't even need an oven. It disappeared very fast!

Base
300g digestive biscuits crushed
75g unsalted butter
3 tablespoons of cocoa powder

Grease a loose bottomed 8 inch cake tin with butter.
Melt the butter in a saucepan and add the biscuit crumbs and the cocoa. Stir the mixture and press into the cake tin. Place in the fridge whilst making the filling.

Filling
300g white chocolate
300g cream cheese
Roughly 280ml sour cream or crème fraiche
6 tablespoons of icing sugar

Melt the white chocolate in a bowl set over a pan of simmering water. Beat together the cream cheese, sour cream and icing sugar until smooth. Add the white chocolate and beat again until smooth. Pour the filling over the base and allow to chill for at least 4 hours, ideally overnight.

I garnished with mistletoe for that festive look!


Also, I now have labels on my blog (check the right side!). So if you're looking for just cooking or just sewing, you can find them all easily!