Something I have wanted to try out for so long is turning wine bottles into beautiful green glasses. I have seen them in a lot of places but this picture from pinterest made me particularly keen. I love the indented glass base in these.
via liveinart
Bailey *borrowed* acetone from work and we went on a mission to find perfect bottles. On our first try we used some beer bottles we didn't want as glasses as a practice, and then did a few wine bottles with our new found skills. On our first attempt out of 7 bottles, we managed to make 2 glasses (one beer, one wine) that were usable. The rest splintered or cracked. It's a bit of a process but we got the hang of it and our odds got better the second day we did it.
We struck gold and found some heineken bottles with the "label" almost painted on like on Corona bottles. These just happened to be the perfect thickness and we had a 99% success rate with these and quickly knocked up 16. We didn't have huge successes with the wine bottles. The below pictures are from our first couple of days with other beer bottles and wine bottles.
There are many tutorials out there, but we mainly followed this one from The Thrillz of Hillz.
Acetone/nail polish remover
Yarn (we used polycotton blend)
Lighter
Large bucket with cold water (and ice)
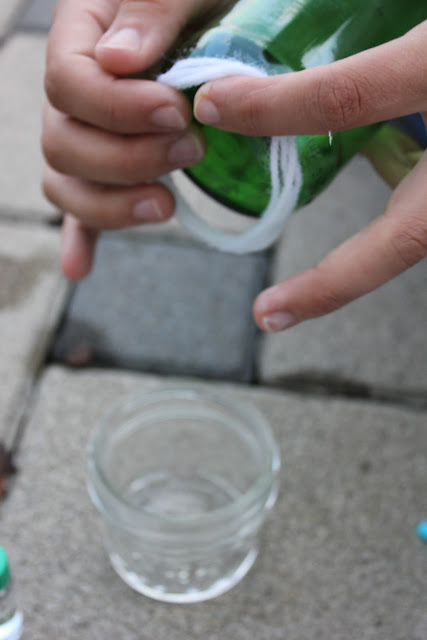
Tie your yarn around the bottle then encircle 3-5 times depending on the thickness of the bottle. Generally we used 3 times around for the beer and 4 or 5 for wine.
Soak the yarn in acetone. Instead of having to remove it from the bottle like in the tutorial we used the little bottles and poured it around the yarn. It used a lot less acetone, was quicker and easier and gave the same result.
Hold the bottle sideways over the sink/bucket and quickly light the yarn. Rotate the bottle with your hands until the flame burns out.
Immediately plunge the bottle head first into the cold water. It should crack and fall off. If it cracks but doesn't fall off shake it a bit or tap it with a wooden spoon for more stubborn bottles. Quite often we managed to get two cuts - one above and one below the string. We're not sure why!
Using heavy duty sandpaper sand down the rim of the bottles inside and out. Careful not to wrap the sandpaper around the rim as you will scratch the top of your glass. Below is one of our successful wine bottle glasses.
A few of the bottles split with a strange point in the middle. I just sanded it down so was no longer spiky and I quite like it like this!


WOW this is really neat. I may have to try this. Thanks for sharing not only the success you had but the possiblity that sometimes it just dont work right.
ReplyDeleteYes it really is trial and error with this. But so worth it! Thanks!
Deleteoh neat! i have a set of these glasses (from wine bottles) that we got as a gift (purchased from a store) and i thought you'd need some sort of heavy duty electric saw to cut the glass so it's neat to see how you did it!
ReplyDeleteThanks! It was fun!
DeleteGood job! The first few for me were frustrating, but I got that hang of it after a while. Nice photos on this tutorial!
ReplyDeletehttp://www.liveinart.org
Once you get the hang of it you can't stop! Thank you!
DeleteI tried to follow these directions several times with different bottles, but none of them would light. The string would burn and turn black but would not light. I tried using matches and lighters but still, it would not work. I'm not sure why.
ReplyDeleteIt sounds like the liquid you were dipping into the string wasn't flammable enough - what were you using? Try nail varnish remover instead (the one with alcohol/ethanol) that's sure to work so long as the whole string is covered in it. Good luck and let me know.
Delete