Pages

Sunday 30 October 2011

Rainbow Cake

Faron had a fancy-dress party with the theme of Africa for his birthday. His favourite thing in the world is cake so I thought I'd go all out with cake and attempt to make it Africa themed. In the end I decided on themed cupcakes and then just an awesome massive cake for the party. For the big cake I decided to do a rainbow cake. I have done this cake before for baileyb's birthday as you can see in the pic below (I did it before I started this blog!) I used this recipe but didn't do the same icing/frosting.


This time however I was attempting the cake without scales and multiple bowls/cake pans. I decided on also doing cupcakes and ordered South African flag cake toppers for them (Faron his half South-African AND it goes well with the party theme!) The process didn't go as smoothly as last time and the colours looked very strange coming out of the oven but after cutting it I realised it did work out after all!


I made cream cheese frosting for both cakes. Unfortunately Faron's wasn't quite good as baileyb's cake as it wasn't thick enough - I think because I should have put more icing sugar in. It was a bit drippy and didn't stick to the sides very well but I managed to cover it.. just. I didn't take any photos of the process this time but here are a few from last time.


The cupcakes turned out well. I made them multi-coloured too and then put the cake topper on top so it looked great.


Here is a photo of our costumes for the Africa theme: Cleopatra and a zebra!

Friday 28 October 2011

Pheasant and Lentils Recipe

As promised in my last post, here is my recipe for pheasant and lentils. The recipe would work well with any other game or even other meats such as beef. To be honest I wasn't a huge fan of the actual pheasant and will try it with something else next time. Apologies for the bad pictures - I had to use my phone as I didn't have my camera on me.


Pheasant with lentils
Serves 2

Ingredients
2 Pheasant breasts
100g red lentils
2 tbsp chopped tomatoes
1 onion
1 rasher back bacon/2 rashers streaky bacon
2 tbsp tomato ketchup
1 tbsp mixed dried herbs
2 tbsp beef gravy granules
Boiling water
Salt and pepper

To begin with, cook your lentils according to instructions (around 15 minutes). Pan fry your pheasant breasts around 6 minutes until just cooked and then remove them from the pan. Finely chop your onion and cut up the bacon and add them to the pan with a splash of  oil. Add the chopped tomatoes and the dried herbs after your onions have softened. Cover the mixture with boiling water (I used water from the lentils) then immediately add your gravy granules and mix in well. Finally add the tomato ketchup, mix well and put your pheasant breasts back in. Season and leave to simmer for at least 10 minutes. When the water has just about gone, add the lentils and simmer a few more minutes until the consistency is right for you. Serve immediately. 


Yum!

Wednesday 26 October 2011

Faron's Birthday

It was Faron's birthday yesterday and I did a LOT of cooking (boys like food)! For his present I got him a bialetti espresso maker as he likes his espresso.


For breakfast I started with a cup of coffee from the coffee maker (hugely successful and highly recommended) and a piece of the very large indulgent chocolate cake I made the day before. It worked out so well..! I had some problems with it initially as it curdled but after adding the warm melted chocolate it was all fine again and tastes delicious.. one of the best cakes I have made!


For lunch I hadn't planned anything but we defrosted some pheasant breasts we had found by chance reduced to £1 last week. As he didn't have much in the way of ingredients I winged it and produced what I can only call a total fluke of a success. I'll post it later with a recipe.

I was totally prepared for dinner though. To start, I decided on a salad and found a recipe I thought would suit Faron's taste - Goat's cheese, Walnut and Pear Salad. It was really good and I highly recommend it. If you are going to make it for a starter I would suggest doing a smaller amount if possible as it was quite filling. This recipe would definitely serve 3 or even 4 small starters.


One of Faron's favourite meals is Tortellini Panne e Proscuitto [Tortellini with cream and proscuitto ham] so I decided to go a step further and attempt making my own pasta. I've done this before but never alone.. This tortellini panne e proscuitto was an excellent recipe. The recipe to make the pasta can be found on here from the same site. What it doesn't say however is do put your dough in the fridge for at least 30 minutes after kneading (tip from Jamie!). 

My shiny new Jamie Oliver pasta maker


Starting to make my own pasta


Kneading the dough was pretty tough. I was worried that it would be stodgy but that's just how it's meant to be.


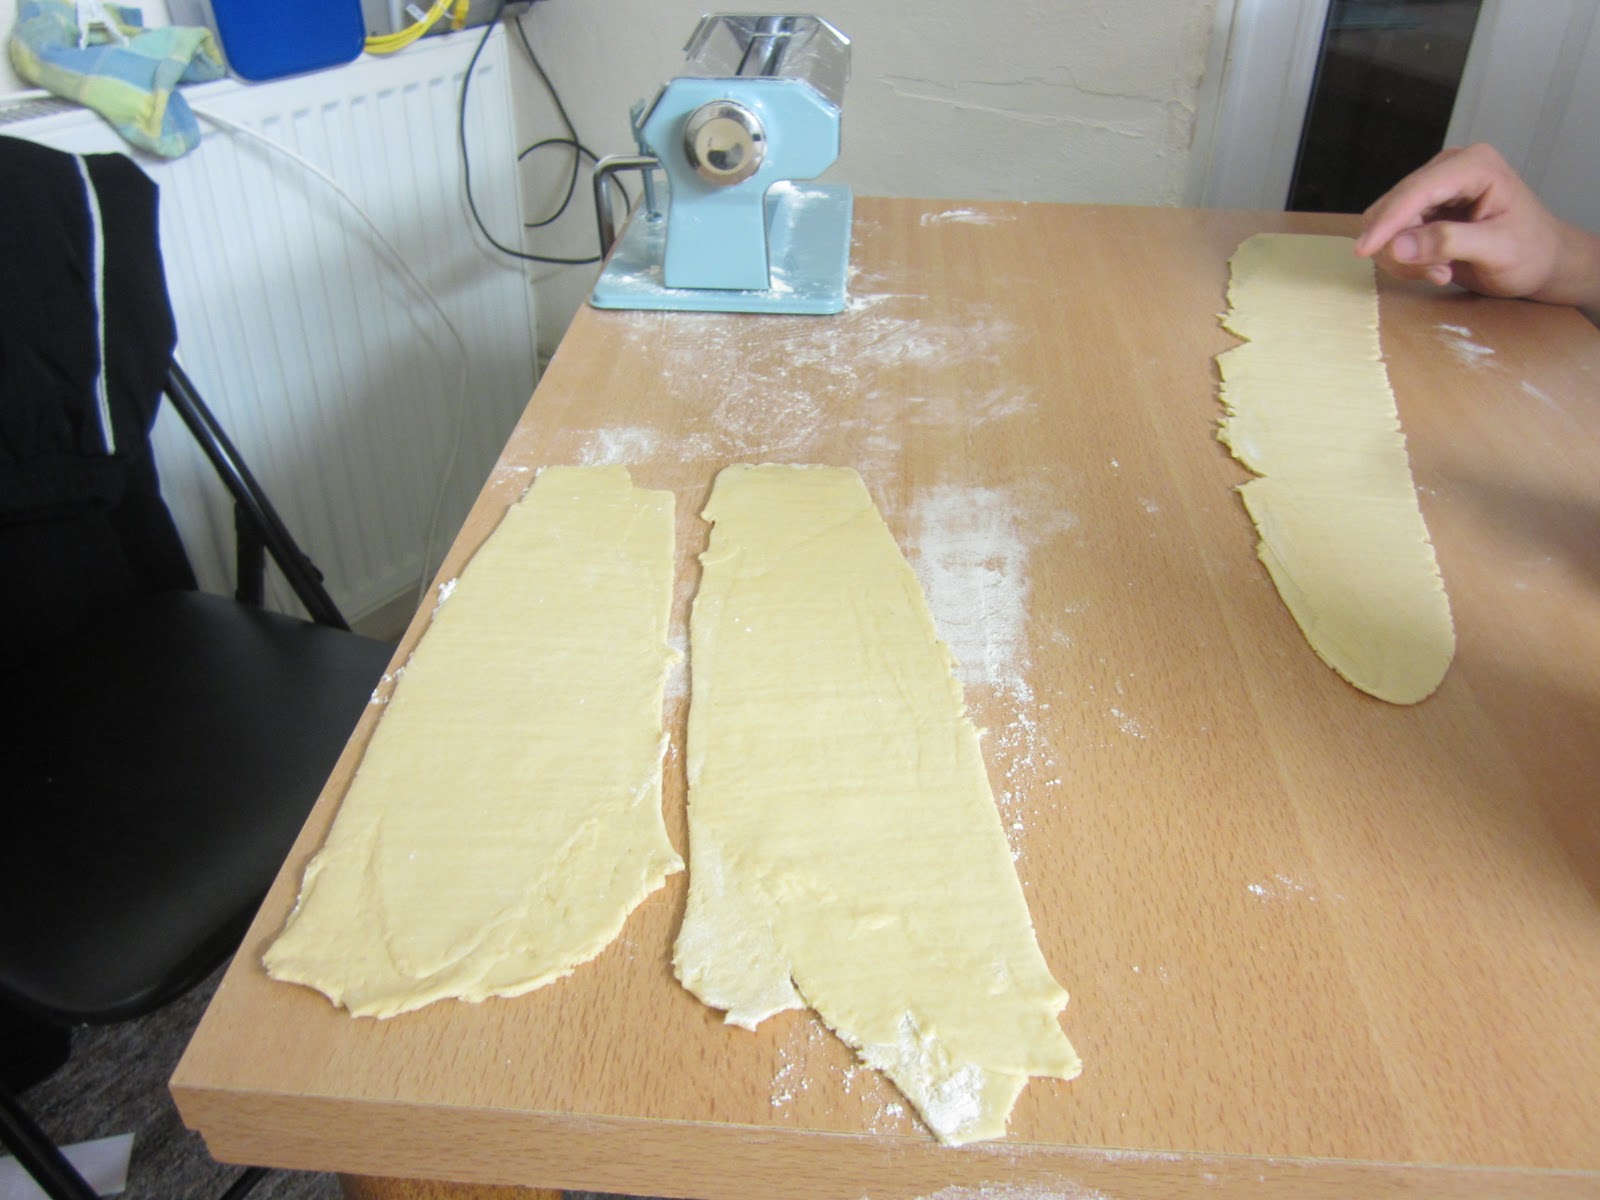
I initially had problems feeding the dough through the machine. It was splitting everywhere. Another tip of Jamie's is after feeding it through the first time, fold it over and do the same thing a couple times on the first setting. Somehow this kills the problem of splitting dough and makes it much easier to work with and much more durable.. so you can then start feeding it through the thinner settings without problems.

I forgot to take a picture of cutting the squares and putting the mixture on them but essentially I cut the above strips horizontally into rough squares (hugely variable in size!) and put the filling on each one before folding.


The finished product! Faron said that it was the best tortellini panne e proscuitto he has ever had (and he gets it a lot!) It was delicious even if I do say so myself and turned out so much better than expected even with all my pasta panicking.


One happy birthday boy

Monday 24 October 2011

Map stationary

I have a growing obsession with maps. One of the first crafts I saw to use maps with was envelopes. I love sending mail through the post and write a lot of letters to friends overseas.. and I love receiving mail (hint!)! I can't find the initial tutorial  I found for the idea for this stationary but I have seen many blogs and tutorials doing the same thing. Below is the card - plain side and a map side and then them in the envelopes in the next picture.


If I made more, or didn't like them so much, they could be a nice gift. When I have more time..


I attempted to type baileyb a letter with my typewriter on one of the map cards but since I changed the ink ribbon on it, it hasn't been working properly. I need to figure out what the problem is. Regardless I sent her the fail of a letter - I love how cool it looks!!


Tuesday 11 October 2011

First house - my room

I apologise for it being a while since my last post. I have started my second year at university and it's been quite chaotic - still is! I have a few things coming up that are not quite ready to blog about yet so I thought I'd show you what I've done with my room in my first ever house! It's not quite finished yet so I won't picture the whole room but until then..
Before..


After.. so far!


I got this fabric from a fabric shop in Brighton - much cheaper than curtains :)


My matching duvet set and storage boxes from ikea


 The painting on the top shelf is a special birthday present I got last year from my parents. One of our close family friends became a painter after moving to New Zealand and is becoming increasingly successful in her area. I love my painting - Talulah asked what colours I liked and painted it for me in her unique style. Check out her other paintings here.